I have been saving old jeans for over 10 years now in hopes to make a jean quilt, well I finally did it! But not for myself, I made 3 full size quilts for Christmas gifts last year and 1 small lap quilt for my 3 year old son.
Something about old, used jeans made into quilts makes me think... Cabin. Antique. Old Fashioned. Most of all, Outdated. So I wanted to give it a fresh spin. I know I'm not the first person to make jean quilts into rag quilts, but I haven't yet found anyone who has done them using a quilt block pattern like I did. Have a look...
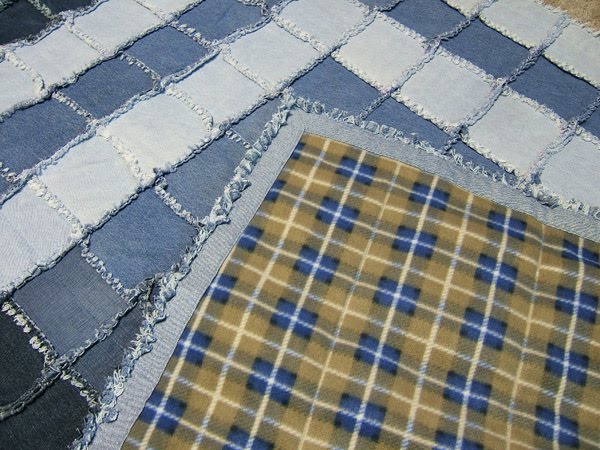
This one is a Log Cabin block with contrasting top and bottom borders. Two of them have a soft fleece backing. I really like the look of the frayed jeans on the outside edges! What do you think?
The other two are camoflauge sweatshirt fleece which is super soft on the inside,(which happens to be in the middle of the quilt so you can't feel it), and kinda canvas like texture on the shown side. Oh well. It looks good right?
This one is just a diagonal pattern, not a quilt block experiment... :-) With Fleece also.
I did try something different, though I'm not sure it worked out very well. I put squares with handles on them from men's jeans. You know the loop on the side of Men's carpenter jeans, I was hoping they would make carrying handles for folding the blanket and carrying it places.
The handles work great for folding it, but these suckers are HEAVY, so not great for carrying this bad boy! Oh well, gave it a shot...
And here is my first completed Jean Quilt I made for Ethan. It is very small. I was getting the hang of sewing the jeans and experimented with using seams and lining them up to make lines and visual interest. You could say this mini quilt was my "test block" for the other quilts. Oh, and my first time using bias seam binding...so ignore those imperfections!! :-)
Using the Seams on blocks was a big mistake! Way too difficult to sew through, especially in a rag quilt!
But Ethan's handles work perfectly on his tiny quilt and he loves carrying it around! Ahhh, what a nice compliment it is when my children enjoy using something I made for them.
Here's a few close ups of my homemade binding... Jeans. I actually didn't bind it the traditional way since it is a rag quilt. I just cut strips of jeans, sewed them together, and sewed them along the back edge of the blanket. No folding over or anything! Easy! And looks great too!
Lastly, I didn't know ANYTHING about quilting when I started these projects, so I used my VERY SOPHISTICATED quilt drawing program "Paint"...lol. Here's how I planned out my patterns for the Log Cabin and I think the other one is a variation of the Log Cabin called Courthouse Steps.
I'm trying some more linky parties!
Transformation Thursdays @ The Shabby Chic Cottage


 I originally made 16 tiles out of lightweight cardboard, but one got severely warped during the sealing (mod-podge) stage so we ended up with a set of 15.
 They are all reversible so there are a TON of ways to combine them into new road maps!
 I made this little parking lot for a future store to go next to. On the reverse of the parking lot pieces are straight and corner pieces so you don't have to use them if you don't want.
 Yes, I realize that there are not all 15 in these pictures...did you notice? Well we have lost a few, since it was Easter he got these, and one didn't look too nice in pictures...all bent up cuz the kids step on them *cringe*. Oh well, they are just kids. And what's the point of making toys if you can't stand to watch them get loved -(ruined)! Lol!
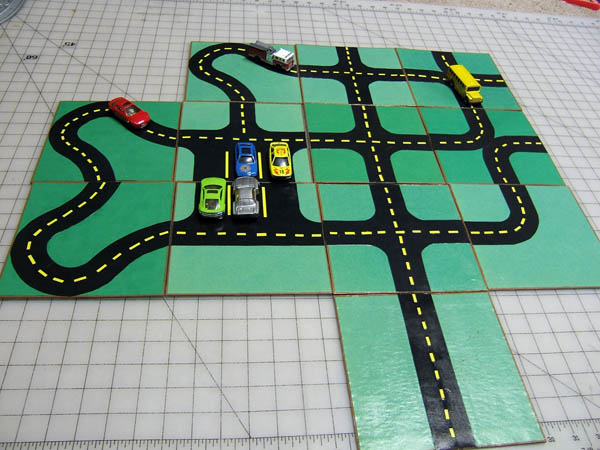 And the credits: A huge Thanks to my dad for making the road patterns on AutoCad, because I am definitely not smart enough to figure out how to make each road line up on every side with perfectly rounded corners and even space in between!! :-)


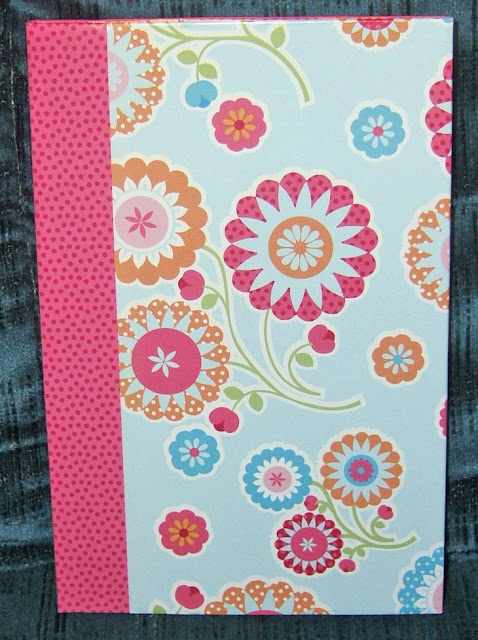
 I taught my Activity Day Girls how to make these notebooks for our activity this week. I bought the ruled notepads at Wal-Mart. I love back-to- school season... everything is on sale! I paid $2.17 for a 5 pack of these 8x5 notebooks.